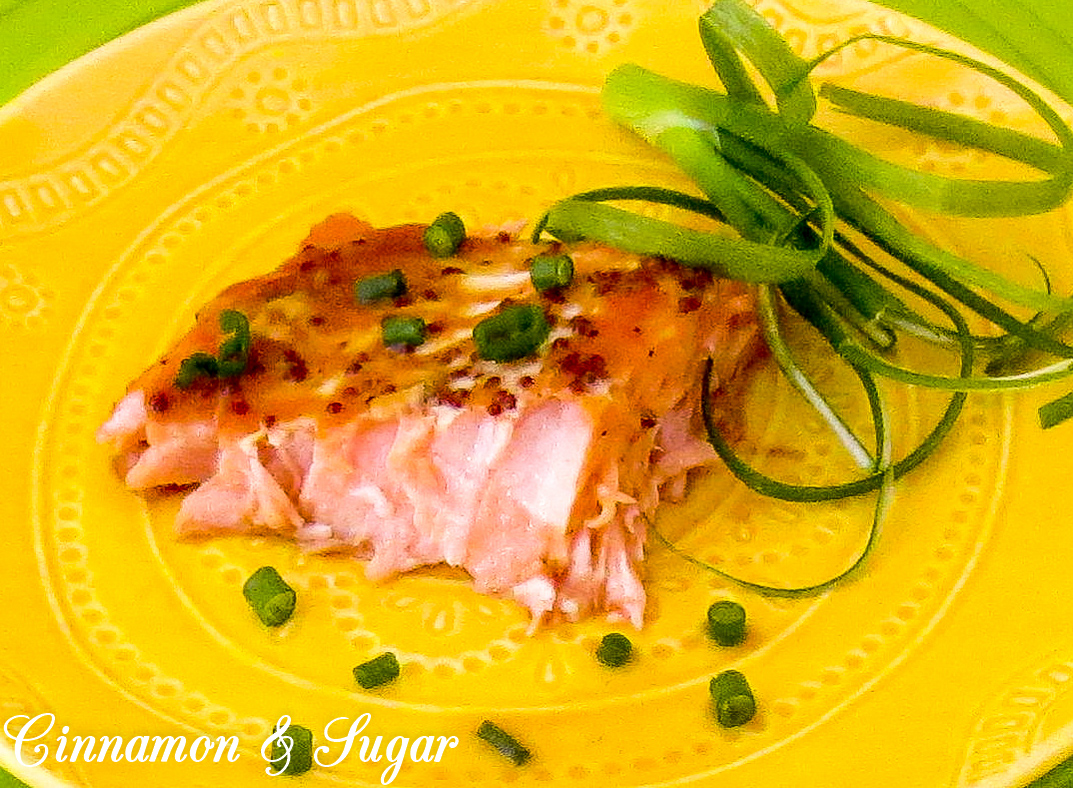
logo
  • Home
  • About
  • Recipe Index
    • Appetizers
    • Bread
    • Breakfast
    • Cakes
    • Candy
    • Cookies & Bars
    • Cupcakes
    • Custards & Puddings
    • Frozen Desserts
    • Jam
    • Main Dishes
    • Misc. Desserts
    • Muffins
    • Pets
    • Pie
    • Salads
    • Seafood
    • Soups & Stews
    • Vegetarian
  • Video Tutorials
  • Cookies & Bars Collection
  • Contact Us
  • Review Submissions

Monthly Archives: February 2015

Maple Syrup & Brown Sugar Glazed Salmon

My husband, being born and raised in the mid-west, was more of a meat & potatoes guy when I met him many years ago.  On the other hand, I was born and raised in Southern California except for a short stay in Central California when my parents plucked us from the coast and set us down in the heart of agricultural country during my high school years. Growing up we always had fresh vegetables or fruit, or both, at every meal.  Quite a bit of our fruit and vegetables were grown in our garden and I spent many hours pulling weeds, watering, harvesting then learning to cook and preserve them. Fresh fish, seafood and poultry were more often seen on our dinner table than meat, and it was always served with plenty of produce and fresh, whole grain bread.  My mother, apparently, was ahead of the game in eating the nutritiously optimal way before we even knew there was such a thing.

When I started cooking for my husband, Dan, he found he had a bit of an adjustment to go through. “Where’s the meat?” was mentioned with a chuckle a few times.  But to set the record straight, he has always picked up his fork, eaten his dinner and thanked me profusely for cooking whatever it is.  Dan hates to cook and really doesn’t know how so he is extremely grateful for any meal on the table that he didn’t have to stress over.

When I first came across the maple syrup & brown sugar glazed salmon recipe in Cooking Light magazine years ago, I told Dan I thought we should try it. “Meh, salmon isn’t my favorite,” he told me. “Not my favorite” is his code word for not liking it.  Now being the sweet wife that I am….I made it anyway.  And the rest is history…. If I try a new salmon recipe I now hear Dan saying, “But the maple salmon is so good.  I don’t know why you think you need to try something new.”  The rest of our family has also become enamored of this recipe and I’m glad because it’s a healthy AND a super quick meal to put on the table. I’ve also included a recipe for salmon cakes which is a great way to use any leftovers.


Salmon-


Maple Syrup & Brown Sugar Glazed Salmon

6 (6 oz each) salmon fillets**
1/4 cup packed brown sugar
1/4 cup maple syrup, the real kind, not pancake syrup
3 tablespoons low-sodium soy sauce (or tamari for gluten-free)
1 tablespoon stone ground Dijon mustard or Maille whole grain mustard (which is our favorite!)
1/4 teaspoon black pepper
Green onion for garnish

IMG_1897A Maple Syrup & Brown Sugar Glazed Salmon


Instructions

Preheat oven to 375 degrees.

Line a baking sheet with foil. Coat with cooking spray and then place fillets on sheet.

Combine sugar, syrup, soy sauce, mustard and pepper and pour over fillets.

Bake for 20 minutes or until fish flakes easily with fork. Baste fish with syrup mixture at least once during the baking period.

Garnish with green onions and drizzle hot sugar mixture over salmon.

** I like to buy whole fillets from Costco and use the leftover cooked salmon for salmon cakes the next night. No need to cut the fillet into individual pieces, just add a few minutes to the baking time.

Recipe inspired by Cooking Light Magazine.


Salmon Cakes-4054


Salmon Cakes

Salmon

12-1/2 ounces leftover salmon, sauce discarded **
1 egg
1/3 cup mayonnaise or Vegenaise
1 tablespoon chopped green onion
1/2 cup panko bread crumbs
1/4 teaspoon salt
1/4 teaspoon fresh ground pepper

Breading

1/2 cup panko bread crumbs

Frying

Vegetable oil (I prefer grape seed oil because it has a high smoking point)

IMG_1910A


Instructions

In a large bowl mix salmon cake ingredients together, flaking any chunks of salmon remaining.


Salmon Cakes--2


Scoop 2 tablespoons of salmon mixture and form into a round patty, 1/2 inch thick. (I like using a spring-loaded cookie scoop for this.)

Place on a foil or plastic lined baking sheet then repeat with remaining salmon. You should have approximately 15 cakes.

Pour remaining 1/2 cup panko crumbs into a dish with a lip. I like a pie plate for this.

Dip each cake into the panko crumbs, making sure to cover both sides. Gently press crumbs into salmon then return to baking sheet.

Heat 2 tablespoons oil in a large skillet over medium heat. Once it reaches sizzling hot carefully place 8 cakes into the pan.

Lower temperature to medium low heat and cook until cakes are golden brown, approximately 3 – 5 minutes.

Turn cakes over and brown. Once done, remove and place on a paper towel lined plate.

Add 2 more tablespoons of oil to your skillet and repeat cooking the remaining cakes.IMG_1957A

Serve with lemon wedges and tarter sauce, or ketchup as Emory prefers.

**If you don’t have leftover salmon you can use raw salmon and pulse in a food processor until coarsely chopped. You don’t want chunks left, but you don’t want it to be mushy either.


Salmon Cakes-


Favorite Treats for Desperate Housedogs

Two weeks ago my granddaughters adopted a rescue puppy and named her Piper.  She’s a cute little thing and immediately wiggled her way into our hearts!  Naturally, as chief baker and spoiler in our family, I needed to make some homemade treats for my new grand-puppy.

IMG_0963EmandPiper

I immediately thought about two authors I met last fall, at a writer’s conference in Long Beach, who write the Pampered Pets Mystery series.  Mary Lee Woods and Anita Carter write under the pen name Sparkle Abbey (the name of their two pets put together). I had an enjoyable time chatting with these lovely ladies over lunch one day and their book series intrigued me.  When I returned home from the conference I downloaded the first book in their series, DESPERATE HOUSEDOGS, and even though we didn’t have a pet in our family at the time, made note that they included a dog treat recipe in their book.

DesperateHousedogs

The story centers around Carolina (Caro) Lamont, a former psychologist turned pet therapist.  She is a Texas transplant living in Laguna Beach where dogs outnumber children and are just as pampered.  One of Caro’s clients is murdered right after she helps him with his two German Shepherds and even though she is cleared as a suspect, her best friend is arrested.  I thought this was a fun read, especially since the setting is a location close to where I live. Sparkle Abbey made the places and people come alive.  I also liked the information provided about different breeds of dogs and their behaviors…I was educated while being entertained. There were several laugh out loud moments and the feud that goes on between Caro and her cousin, Melinda, (who owns upscale doggie boutique, Bow Wow) adds another layer of intrigue. Sparkle writes the odd number books with Caro as the protagonist and Abbey writes the even number from Mel’s point of view.  I’ve read a couple other books in this series (all just as fun!) and will definitely be reading the rest. And besides, who can resist such clever titles?  Get Fluffy, Fifty Shades of Greyhound, Girl with the Dachshund Tattoo to name a few!


Favorite Treats for Desperate Housedogs

Favorite Treats for Desperate Housedogs

Caro’s Good Dog Treats

From the Pampered Pet mystery, Desperate Housedogs, by Sparkle Abbey
(Permission obtained from the authors to share this recipe)

First, preheat your oven to 350 degrees Fahrenheit

In a big bowl, combine all the ingredients with just enough water (I used 3-1/2 tablespoons) to make it the consistency of cookie dough.

1/2 cup creamy unsalted peanut butter
1 cup oat flour
1 cup brown rice flour (Caro uses organic)
1 egg
1 tablespoon honey
1/2 cup finely grated carrot (Dogbert, Caro’s dog, loves carrots)

Optional: You can also add cooked bacon, a bit of grated cheese, or other ingredients for flavor, but don’t add too much or it will mess with the consistency of the dough, and cause your treats to fall apart.

IMG_2616A

Once you’ve got your treat dough all stirred up, put it between pieces of parchment paper** and roll it out to about 1/4 inch thickness. Then cut the dough with a cookie cutter. You can use whatever shape strikes your fancy. Caro often uses dog bone shapes of different sizes. Next, put them on a regular cookie sheet, lined with parchment paper, and bake them between fifteen and twenty minutes or until they are golden retriever brown.

IMG_2617A

Let them cool on a wire rack and then put them in an airtight container. You can store these Favorite Treats for Desperate Housedogs about a week (or you can freeze them for later use) but keep an eye on them. There are no preservatives, so watch for spoilage.

Favorite Treats for Desperate Housedogs

Favorite Treats for Desperate Housedogs


This makes a couple of dozen treats so there’s plenty to go around. Please share them with your dog.

Tips:

  • If you wish, pulverize old-fashioned oats in your food processor to make the oat flour. Just don’t use the sugary instant oatmeal.
  • Use the food processor (no need to rinse out after processing oats) to finely chop your carrots. I forgot to buy a “big” carrot for grating and all I had was baby snack carrots on hand. 2-1/2 ounces made 1/2 cup of finely chopped carrots.
  • **I found it was easy to roll the dough out on a brown rice floured surface instead of using the parchment paper. Don’t use regular flour otherwise the treats won’t be gluten-free.


Here’s an updated photo of Piper at 6-months-old:


Photo creds: my 10-year-old granddaughter, Emory

Photo credit: my 10-year-old granddaughter, Emory


If You Give a Moose a Muffin

Happy National Muffin Day!  I know you’re probably thinking I’ve got a great muffin recipe to share… I do, just not today.  Instead I’m sharing a story and a cookie tutorial inspired by my twelve-year-old granddaughter, Jaidyn, who battles with Rett Syndrome every day.  Rett Syndrome stole Jaidyn’s language when she was just two. Communication is difficult to say the least, but thankfully we have an iPad app that helps tremendously.

Before Christmas Jaidyn and her classmates went shopping at Ikea to buy gifts for family members.  Jaidyn chose adorable woodland creature cookie cutters for me!  Have I mentioned I won’t mention how many cookie cutters I have stashed away?  But amazingly, I did not have any of the cutters Jaidyn picked out.  I asked Jaidyn which cookie cutter I should make for her class.  I was thinking a cute squirrel or fox…. but nope, she was adamant it had to be the moose.  Moose?  Moose aren’t cute…and I’m all about cute.  I told her okay then struggled for a couple of days on how I was going to decorate the moose…. thank goodness for Pinterest! As soon as I typed “moose” up popped the kids’  book “If You Give a Moose a Muffin.”  And that’s when I realized Jaidyn was familiar with the book and it was probably what she had in mind.

The next time I saw Jaidyn I showed her a picture of the book cover along with the cookie cutter and asked if that’s what she wanted. The HUGE smile on her face and her giggles that filled the air told me I was right!

If You Give a Moose a Muffin


Baking and decorating sugar cookies can be time consuming so I like to spread the procedures over several days or even longer.  I make the cookie dough one day and store in the refrigerator.  Bake the cookies another day and store in an airtight container, then get to the decorating when I can plan a free morning. Unlike some cookies, decorated sugar cookies will be fine for 2 or 3 weeks if stored properly (in an airtight container away from heat and moisture).

If You Give A Moose A Muffin

Chocolate Sugar Cookies Recipe

Ingredients

3 cups flour
1/2 teaspoon salt
1/2 cup Dutch-process cocoa powder
1 teaspoon baking powder
1 cup unsalted butter, room temperature
1 cup white granulated sugar
3 tablespoons Hershey’s chocolate syrup
1 egg, room temperature
1 teaspoon vanilla extract

Instructions

Sift the flour, cocoa and baking powder together and set aside.

In the bowl of your stand mixer, cream butter and sugar together until light and fluffy, about 3 minutes.

Add eggs, one at a time, and beat until thoroughly incorporated. Add the chocolate syrup and vanilla, mix well.

With your stand mixer running on low, slowly add the dry ingredients to the butter mixture and blend until flour is fully incorporated.

Divide dough into two portions and wrap tightly with plastic wrap. Place in the refrigerator for at least 1 hour or overnight. I make my dough several days in advance and keep refrigerated. If you chill for longer than an hour or two, let the dough sit on the counter for an hour before rolling out, or soften in microwave for 15 seconds.

Preheat oven to 350 degrees

Sprinkle your rolling surface lightly with flour and dust your rolling pin with flour. I like using a silicone rolling mat and a silicone rolling pin. Roll to desired thickness and cut into desired shapes.

IMG_1659 (2)

Place on a parchment lined baking sheet and put into the refrigerator for at least ten minutes prior to baking. This will help keep the cookie shapes intact. If your dough is warm before baking your shapes may spread too much.

Bake at 350 degrees for 9 to 10 minutes, rotating pan half way through baking time. Since the chocolate makes it impossible to see if the edges are turning golden brown, start with one test cookie and bake 10 minutes. Remove from oven and let cool. Check for doneness and adjust cooking time accordingly.

We like our cookies on the thin side and I can get 35 – 40 3-inch cookies.

Tips

  • I have read numerous times to NOT reuse the cookie dough scraps more than once. I reuse the dough until there’s not enough left to get a cookie out of it. The cookie glaze icing will soften the cookies enough if they get a bit tough from being overworked. However, it will be time to toss the extra dough if it gets dry and crumbly if you’ve used too much flour during rolling.

Recipe inspired by cakecentral.com

Royal Icing

3 tablespoons Meringue Power (I use Wilton brand)
4 cups, 1 pound confectioners’ sugar
5 tablespoons warm water

Beat all ingredients until icing forms peaks (7-10 minutes at low speed with a heavy-duty mixer, 10-12 minutes at high speed with a hand-held mixer).Royal icing and mooseTips

  • It is imperative that your bowls, spoons, spatulas, beaters and anything else that comes in contact with this icing is grease free.  I use Dawn Liquid Dish soap on these items because I know it will remove any trace of residual grease.
  • Cover the icing bowl with a damp paper towel or plastic wrap in between working with it.  For longer storage, store in ziplock bag in the refrigerator.  Icing will keep for one week.

Recipe is from wilton.com

Cookie Icing Glaze

(optional)

1 cup (4.5 ounces) powdered sugar – no need to sift
1 tablespoon + 1 teaspoon water

Vigorously mix together with a spoon until completely smooth. You’re looking for “7 – 8 second icing” which means when you drip the icing back into the bowl, it’s incorporated into the rest of the icing within that time frame.  Adjust the consistency with additional sugar or water as necessary.


If You Give a Moose a Muffin

Procedure

Additional Items Needed

3 Pastry bags (I like the disposable plastic kind)
2 Size 3 Wilton Tipss
Black edible marker (Gourmet Writer is my favorite brand…and I’ve tried a lot of them!)
Gold sparkling sugar (I found mine at Williams-Sonoma during the holidays)
or you can use any colored sprinkles or chocolate jimmies you wish
Silicone pastry brush

If you choose (and I do recommend since your cookie will taste better), lightly ice the back of each cookie with a thin layer of icing glaze using the silicone pastry brush.   Let dry several hours or overnight, icing exposed to air.  Moose cookie back icing

Prepare royal icing.

Place a small amount of the stiff white royal icing in a small bowl and thin with water until you have a spreadable consistency.  You want it to be similar to the icing glaze. Cover the remaining royal icing with a damp paper towel.

Working with one cookie at a time, use a silicone pastry brush to carefully brush the antlers and hooves with the thinned icing, on the front side of the moose.  Immediately sprinkle the wet icing heavily with the gold sanding sugar or jimmies.  I like to do this over a paper plate so that I can collect the extra sprinkles and use them again on additional moose. Repeat until all the cookies have gold antlers and hooves.

Place a small amount of white royal icing into a pastry bag fitted with Tip 3.  This will be for the eyes.  Cover the tip with a damp paper towel to keep the icing from drying out.

Tint enough stiff royal icing red for both outlining and flooding. This will ensure they match perfectly. Add color a bit at a time until desired hue is achieved.  For the sweater I used a combination of Super Red, Tulip Red and a very minute amount of Brown, all from Ameri-Color.  I make sure I have more than I really need. I hate to stop decorating and color more icing.

Place some of the stiff red icing in a pastry bag fitted with Tip 3.  Cover the tip with a damp paper towel to keep the icing from drying out.

Thin the remaining red icing with water.  For every cup of royal icing add one teaspoon of water and stir with a grease-free utensil. Add 1/2 teaspoon water and stir.  Repeat until desired consistency is reached.  For “flooding” the sweaters, aim for 8 – 10 second icing.

Moose cookies royal icing flooding

Place about 1/4 cup thinned icing in a pastry bag and snip the end just enough to obtain a slow drizzle. Cover the remaining icing with a damp paper towel.

Working with one cookie at a time, outline the sweater with the thick red royal icing.  Immediately fill in the sweater using the thinned royal icing.  If small air bubbles appear, pop with a wooden skewer before icing has a chance to firm.  Set aside and proceed with remaining cookies.  (You can search YouTube for video tutorials on piping and flooding.)

Moose cookie flooding

Once sweaters are completed, use the stiff white royal icing to pipe small dots for the eyes.  No matter how much I’ve practiced, my “dots” always look like a Hershey Kiss – pointy on top.  If this happens to you, let the icing crust for two minutes then use a barely damp finger and gently press down to flatten.  No one will ever know!

Let dry until completely firm, at least eight hours, but longer is better.

Use the black edible marker to make an iris for the eyes and draw ribbing lines on the sweaters.

Stand back and be prepared to be showered with compliments!If You Give a Moose a Muffin


Mardi Gras King Cake Cupcakes

Ever since I was a child, one of my favorite leisurely things to do is pick up a good mystery, curl up on the sofa and read the afternoon away. With the convenience of reading and purchasing digital books on a Kindle, I rarely find time to browse for new books at a bookstore…which is a shame.  There’s something magical about holding printed pages in your hand, looking at colorful cover art and discovering a new author.  Last week I was lucky and had a free hour after running some errands and spied a Barnes and Nobel in the same shopping area I was visiting.  I locked my packages in my car and proceeded to browse row upon row of books.

Cake on a Hot Tin Roof by Jacklyn Brady grabbed my attention for a few reasons.  First of all I adore fun word play twists on titles; then the King Cake on the cover art intrigued me since I assumed it would be a mystery centered around baking; and lastly it’s Mardi Gras season and what better way to get into the spirit when you’re not in New Orleans in person?  Cake on a Hot Tin Roof was a fun read. Rita Lucero owns the bakery, Zydeco, in New Orleans.  She and her staff are already overworked baking hundreds of King Cakes during Mardi Gras season when her aunt and uncle show up unannounced, visiting from New Mexico. When an obnoxious guest is murdered at a gala Rita is hosting, her uncle is a suspect since he was in a violent altercation with the deceased earlier in the evening.  Rita decides she must clear her uncle’s name since he seems to be harboring secrets that make him appear guilty.  Jacklyn Brady brings the flavors, sights and festive spirit of New Orleans to life in the book (along with recipes) and I look forward to reading more of her work!


Mardi Gras King Cake Cupcakes


Mardi Gras King Cake Cupcakes

While King Cake is traditionally baked into a ring, I decided to make it into cupcake shapes.  I love the ease of sharing and serving this way.  If you are not familiar with King Cake, be aware that it is more of a yeasty sweet bread and my Mardi Gras King Cake Cupcakes are reminiscent of cinnamon rolls.

Makes 15 “Cupcakes”

Ingredients

Dough:

2/3 cup milk (whole, 2%, coconut, almond or soy)
3 tablespoons butter or vegan buttery sticks such as Earth Balance
1/4 cup granulated sugar
1 teaspoon vanilla extract
1 egg, room temperature
1 teaspoon salt
1/4 teaspoon freshly grated nutmeg
1/2 teaspoon ground cinnamon
2-3/4 cups (13.6 ounces) all-purpose flour (scoop & measure method)
1-1/2 teaspoons instant active yeast

Filling:

1/2 cup packed brown sugar
2 teaspoons ground cinnamon
1/4 teaspoon freshly ground nutmeg
1/2 cup chopped pecans
2 tablespoons all-purpose flour
1/4 teaspoon salt
1/4 cup (4 tablespoons) melted butter or vegan buttery sticks such as Earth Balance

Icing:

2 cups confectioners’ sugar
1 tablespoon choice of milk (whole, 2%, coconut, almond or soy) + more if needed

Purple, yellow and green sparkling sugar sprinkles

Instructions

 Dough:

Place your choice of milk and the butter/margarine in a microwave safe dish and heat to approximately 105-110 degrees. Butter does not need to melt completely. My microwave took 45 seconds. If mixture overheats, let it cool while you collect the rest of the ingredients. If it’s cooler than 105 degrees, it will be okay too.

IMG_2434A

Use a rasp style grater on fresh nutmeg

IMG_2436A

Layer ingredients in bread machine pan


Place milk mixture, sugar, salt, vanilla and egg into the pan of your bread machine. Layer flour, cinnamon and nutmeg next. Make a well in the flour and carefully add the yeast. Make sure you follow your bread machine’s operating directions for adding ingredients in the correct order.

Start the dough cycle on your bread machine.  Once the kneading cycle begins, the dough should feel tacky but still pull away from the sides of the bread machine pan. If too wet, add 1 tablespoon of flour at a time. If too dry, add 1 tablespoon of water at a time. Humidity plays a role – I made these when the Santa Ana winds were blowing in from the desert and I had to add more liquid.

Filling:

Mix brown sugar, cinnamon, nutmeg, pecans, and flour together. Stir melted butter into the mixture until thoroughly moistened. Set aside until dough is ready.

Assembling “Cupcakes” **

Line a cupcake pan with paper liners and spritz each liner with cooking spray.

Turn dough out onto a flour-dusted surface and roll into a large rectangle (approximately 18” x 14”). Sprinkle the filling mixture over the dough and gently press to compact.

IMG_2447A

Spread filling and roll into cylinder

Beginning at the wide end, roll the dough into a tight cylinder then pinch the edges together to seal.

With a serrated knife, slice into 1-inch pieces. Place each piece into a cupcake liner and let rise until puffy, 45 – 55 minutes, in a warm, dry place. I like my cold oven with the light turned on for rising.


IMG_2459A

Puffy “cupcakes” after rising


IMG_2465A

Golden brown and waiting for icing

Preheat oven to 375 degrees. Place cupcake pan in oven and bake 10 – 12 minutes, until golden brown and the internal temperature reaches 190 degrees.

Remove from oven and cool in pan for five minutes. Remove “cupcakes” and finish cooling on a wire rack.


Once “cupcakes” are cooled, mix the confectioners’ sugar with your choice of milk. It should be pretty thick but if it’s not spreadable, add additional milk 1/2 teaspoon at a time.

Working with one “cupcake” at a time, spread icing over top then sprinkle one stripe of purple, yellow and green sparkling sugar onto the icing. Set aside to dry and proceed with remaining “cupcakes.”

Mardi Gras King Cake Cupcakes


** Alternately, you can bake this into a traditional King Cake shape. Once you have your dough filled and rolled into a tight cylinder bring the ends together to form a ring and pinch to seal the ends together. Place the ring on a parchment lined baking sheet and let rise for 45 – 55 minutes. Preheat oven to 375 degrees and bake 25 – 30 minutes. Once cake is cooled ice and decorate with purple, yellow and green sparkling sugar.

Tips:

  • My favorite instant read thermometer is Thermapen Digital Thermometer
  • Set cooling rack over baking sheet to catch icing drips.
  • Sprinkle each sparkling sugar color over it’s own paper plate. You’ll be able to reuse the sprinkles for additional “cupcakes” when the plate collects enough.


Mom’s Famous Rhubarb Pie & Easy Peasy Pie Dough

When I started dating my now husband and he decided we were serious enough, he took me “home” to Illinois to meet his parents and family. His parents, bless their hearts, immediately took me in and made me feel like a part of the family. One of my earliest memories of those visits was Dan’s mom making pie, specifically rhubarb pie, every time we came. And dare I admit that I would get up in the morning and finish off the pie for breakfast?!?! Back in the good ‘ol days when I could still eat gluten products. My mother-in-law, Grace, grew up on a farm with nine siblings.  Each kid in the family had a specific chore they were responsible for and her chore was baking pies… I think almost every day!  It was obvious to me that practice makes perfect once I took a bite of her fabulously flaky, tender crust with the juicy, sweet yet tart, ruby rhubarb filling. Grace was very gracious and gave me her recipe once I gobbled up her pies.  While I got the filling right, I discovered it takes a very practiced hand to make a good pie crust, so I gave up…and reverted back to buying Pillsbury refrigerated pie dough.  Which, by the way, is a great pie dough… it just can’t compare with really good homemade crust though. Then lo and behold I discovered VODKA!  Yeah, we drink it too… but, substituting some of the water in pie dough with vodka makes for an almost fool-proof pie crust.  With vodka and a food processor to quickly bring the dough together, I achieved the near impossible…this is every bit as good as my mother-in-law’s crust.  And if you make it ahead of time, it’s almost as convenient as the boughten stuff.   Once you’ve tried it, you just might be getting up early to polish off the pie for breakfast too!


Rhubarb Pie-


Rhubarb Pie

Preheat oven to 450 degrees

Ingredients:
4 cups chopped Rhubarb (frozen is okay, but don’t defrost)
1-1/3 cups white granulated sugar
6 tablespoons all-purpose flour
1/4 teaspoon salt
1 tablespoon butter or Earth Balance margarine (optional)
9” double crust pastry pie dough
1 tablespoon coarse sparkling sugar, or regular granulated sugar

Instructions: Lay one of the rolled out pastry pie dough rounds into a 9” pie plate. Glass or ceramic dishes bake better than metal, but use what you already have. Combine sugar, flour and salt. Whisk together until flour is incorporated into sugar then mix in the rhubarb, fresh or frozen.

IMG_2280A

Make sure all the sugar and flour mixture is included in the pie.

IMG_2277A

If your rhubarb is frozen, no need to defrost. Just dump it into a bowl.

Once the rhubarb is coated with sugar mixture, place on top of pie dough lined dish. Dot with butter or margarine if using. Cover rhubarb with remaining pie dough round and crimp edges. With a sharp knife, make decorative slits in top crust. Brush VERY lightly with a bit of water (1/4 – 1/2 teaspoon max) then sprinkle sugar over top.

IMG_2286A

Sprinkle the top of the crust with sugar. Coarse sparkling sugar gives the pie an additional layer of texture and visual appeal.

Place pie on rack situated middle/lower part of oven. Bake for 15 minutes at 450 degrees then reduce oven temperature to 350 degrees. Rotate pie around and bake for an additional 40 to 45 minutes. If you used frozen rhubarb you will need to add an additional 10 minutes or so to the baking time. You will know it is done when the crust is golden brown and you can see the filling bubbling in the slits.

For extra large deep dish pie:

6 cups rhubarb, 2 cups sugar, 1/2 cup flour, 1/2 teaspoon salt, 1-1/2 tablespoons butter. Bake at 450 degrees for 15 minutes, decrease temperature to 350 degrees and bake an additional 50 – 60 minutes or until filling is bubbling.

Recipe inspired by my mother-in-law, Grace Davis. On a personal note, Grace recently passed away at the age of 96-year-old. We hold our sweet memories of her dear to our heart and treasure the love she showed us through her delicious pies.


Rhubarb Pie-2329


Double Crust Pie Dough

Ingredients:
2-1/2 cups (12-1/2 ounces) all purpose flour
2 tablespoons (1 ounce) granulated sugar
1 teaspoon salt
1-1/4 cup vegetable shortening OR 3/4 cup vegetable shortening and 1/2 cup (1 stick) unsalted butter, all thoroughly chilled.  I use all shortening to keep it dairy-free and vegan.
1/4 cup vodka (any brand), chilled
2-3 tablespoons ice cold water

Dough Instructions:
Place flour, sugar and salt in a food process and pulse 5 times until combined.

IMG_2197A

COLD shortening has been worked into the flour.

Add shortening (cut into medium/small pieces) and butter if using (cut into small cubes) and pulse about 15 times. Scrape down bowl and pulse 3 or 4 more times. Mix 2 tablespoons of ice cold water with the chilled vodka and sprinkle over the flour mixture. If you live in a very dry place or have central air or heat going, you may need to add the additional tablespoon of water.  This dough can handle being more moist than traditional pie crust recipes.

IMG_2198A

Vodka and water have been pulsed in. Flour mixture should just be moistened, not worked.

Pulse just until the dough begins to stick together. It took me about 6 pulses. You don’t want it to come together in a ball. Overworking the dough is what makes it tough.

IMG_2205A

Compress into disks and chill.

Transfer the dough onto a non-stick surface and divide dough in half. Compress each half into a ball and flatten, then wrap well with plastic wrap. Refrigerate for at least an hour and up to 3 days.

Rolling it out:
Remove one disk from the refrigerator and place on well-floured work surface.   I love my silicone mat and rolling pin for this. Flour the top of the dough along with your rolling pin. Roll the dough into a circle large enough to fit your pie plate with some overhang.

IMG_2273A

Obviously I’m not very accurate at getting it round…but by the time it’s in the dish and trimmed no one knows!

Carefully place the dough into your pie plate then press into the bottoms and sides. If the dough tears just compress it back together. If there’s more than 1 inch of overhang, trim the excess and reserve the dough for cinnamon pie dough rolls.

IMG_2276A

Trim the edges and save the extra dough for Cinnamon pie crust rolls!

If you are baking a single piecrust recipe, roll the top crust under to form a nice edge and flute or score with the back of a fork.  Bake as your pie recipe directs.

For a double crust pie, place the dough lined pie plate back into the refrigerator while you work on the filling. Once the filling is completed, roll out your second disk of dough large enough to cover your pie plate. Fill the bottom crust with filling, top with the dough round, trim edges and flute. Proceed to bake according to your pie recipe.

This dough freezes well for 3 months. Just defrost in the refrigerator overnight then proceed with the directions.

Recipe inspired by America’s Test Kitchen

Tips:

  • If the crust begins to get too brown during baking, cover with pieces of foil or a pie crust shield. I have the “old” metal one but I noticed amazon now has an adjustable silicone model…. I think that might go on my birthday wish list!
  • During the spring and early summer when rhubarb is in season, I buy extra and freeze it for the winter months.  Simply wash and chop the rhubarb into small chunks.  Pat dry and place in a freezer-safe ziplock bag, squeezing the air from the bag before sealing.  I freeze mine in 4 cup increments so I don’t have to remeasure when baking pie.  I’ve kept frozen rhubarb for 8 months and the resulting pie tasted just fine.

IMG_2294A

Cinnamon Pie Dough Rolls

No measurements here…. Just go with it! Collect the scraps from your leftover pie dough. Compress together then roll out into a thin round (1/8 inch thick or less.) Spread a thin layer of melted butter or margarine over the rolled out dough. Sprinkle granulated sugar over the butter then top with sprinkles of cinnamon. Gently press the mixture into the dough. Starting at the long side, roll the dough into a circular tube and pinch the seams together. Slice into 1-inch pieces and place cut side down onto a baking sheet.IMG_2289A Bake until golden brown at 350 degrees (or whatever temperature your pie is baking at.) My rolls took about 20 minutes. Cool just until they don’t burn your mouth when eating, then enjoy!

Recipe inspired by my mother-in-law, Grace Davis

Rocky Road Cookie Bars

Numerous years ago (too many to keep track of!) I was looking for a new mystery author to read.  I was visiting my dear cousin, Mary, and she introduced me to the series Joanne Fluke writes:  Hannah Swensen Mysteries with Recipes.  The first one I read was Chocolate Chip Cookie Murder… a not too scary murder mystery with yummy recipes… I was hooked!  I recently found one in her series that I had somehow overlooked and immediately snatched it up.  Carrot Cake Murder did not disappoint!

Carrot Cake Murder (as in all of the series) revolves around Hannah Swensen, owner of The Cookie Jar bakery.  Hannah and her partner Lisa are always dreaming up new cookie recipes which they share in the book, along with other family recipes.  In between mixing and baking sweets, Hannah finds the body of Lisa’s murdered uncle, with her famous carrot cake nearby.  Hannah has developed a reputation for solving murders and she enlists the help of her partner and her sisters to find the killer before he or she strikes again.

One of the recipes in Carrot Cake Murder is Rocky Road Bar Cookies, which is quite a bit like S’mores. Using the Cookie Jar’s recipe for inspiration I adapted it so that both I and my husband could eat it.  Not only is this a super quick and easy recipe, it can also be made gluten-free AND dairy-free!  If you don’t have any dietary restrictions it’s very easy to use ingredients you probably already have in your pantry.

Not only is Rocky Road Cookie Bars a super quick and easy recipe, it can also be made gluten-free AND dairy-free!


Rocky Road Cookie Bars

  • 1 cup graham cracker crumbs – either Honey Maid or gluten-free graham cracker crumbs such as Kinnikinnick brand
  • 1/4 teaspoon salt
  • 1-1/4 cup mini marshmallows
  • 3/4 cup chocolate chips (milk, semi-sweet or dark) or gluten-free, vegan chocolate chips such as  Enjoy Life brand
  • 1/2 cup walnuts (or your favorite nut)
  • 1/2 stick (2 ounces) butter or Vegan buttery sticks such as Earth Balance brand
  • 1/4 cup brown sugar

Preheat oven to 350 degrees

Coat an 8×8 square glass baking dish with nonstick cooking spray.

Mix the graham cracker crumbs with the salt and press into the bottom of the baking dish. Layer the marshmallows on top of the graham cracker crumbs (you can use a bit more if you need to fill in any blank areas on the crumbs.) Sprinkle your choice of chocolate chips over the marshmallows then top with your choice of nuts. My favorite nut happens to be walnuts followed closely by pecans.

Place the butter and brown sugar (it’s okay if the sugar is hard and lumpy) in a microwave safe measuring cup and cover with a paper towel. Heat on high for one minute, stirring at the 30 second mark. Heat in additional 20 second intervals until brown sugar is dissolved in the butter.

After spooning the butter and sugar mixture over the layers of yumminess, gently press down on the ingredients with the back of a large spoon. You don’t need to compact it too much, just a bit.

Not only is Rocky Road Cookie Bars a super quick and easy recipe, it can also be made gluten-free AND dairy-free!

The layers are compacted down a bit and ready to go into the oven

Place the baking dish on the middle rack of your 350 degree preheated oven. Bake for 12 to 14 minutes. The bits of marshmallows that show should get golden brown, but not dark.

Remove from oven and completely cool. I couldn’t wait to try them so I placed my dish in the refrigerator for an hour.

Not only is Rocky Road Cookie Bars a super quick and easy recipe, it can also be made gluten-free AND dairy-free!

The layers melt together into gooey yumminess!

Once completely cool, cut into 12 to 16 pieces and serve. These are very rich. Small pieces are probably better so people won’t feel quite so guilty going back for seconds…or thirds….


Not only is Rocky Road Cookie Bars a super quick and easy recipe, it can also be made gluten-free AND dairy-free!


Next Page »

Search

Get recipes & giveaway offers delivered to your email:

You will receive an email that requires verification in order to have posts sent to your inbox. You may need to check your spam folder. Thanks for following!

Enter your email address:

Delivered by FeedBurner

About Kim Davis

I love to bake all sorts of treats and on occasion indulge my inner artist by decorating cakes and cookies. Follow along with me for recipes, and creative inspiration in the kitchen along with reviews on what mystery I'm reading.

Pages

  • About
  • Contact Us
  • Cookies & Bars Collection
  • Review Submissions
  • Video Tutorials

Recent Posts

  • Lemon Cakes
  • Zucchini Pineapple Cake
  • Orange Sablés
  • Appie Oaters
  • Chicken Vegetable Soup

Links to Authors

Kathy Aarons
Sparkle Abbey
Kristi Abbott
Victoria Abbott
Rebecca Adler
Ellie Alexander
Connie Archer
Winnie Archer
Mary Lee Ashford
Karoline Barrett
Cynthia Baxter
Sally Berneathy
Stephanie Blackmoore
Bethany Blake
Ginger Bolton
Laura Bradford
Jacklyn Brady
Sandra Bretting
Catherine Bruns
Julia Buckley
Leslie Budewitz
Lucy Burdette
Elizabeth Buzzelli/Elizabeth Lee
Ellen Byron
Lynn Cahoon
Janet Cantrell
Kate Carlisle
Laura Childs
Peg Cochran
Sheila Connolly
Marla Cooper
Maya Corrigan
Cleo Coyle
Emma Dakin
Kathi Daley
Krista Davis
Vicki Delany/Eva Gates
Leighann Dobbs
Carrie Doyle
Pamela DuMond
Wendy Sand Eckel
Linda Fairstein
Sharon Farrow
Joanne Fluke
Susan Furlong
A. Gardner
Deborah Garner
Daryl Wood Gerber/Avery Aames
Debra H. Goldstein
Patrice Greenwood
Victoria Hamilton
H.Y. Hanna
Heather Haven
B.B. Haywood
Betty Hechtman
Lee Hollis 
Linda O. Johnston
Jenny Kales
Tonya Kappes
Leslie Karst
Tina Kashian
Michelle Kelly
Libby Klein
Maureen Klovers
Gayle Leeson
Julie Anne Lindsey
Linda Lovely
Karen MacInerney
Meg Macy
Edith Maxwell/Maddie Day
Maggie McConnon
Jenn McKinlay
Amy Patricia Meade
Leslie Meier
Sharon Arthur Moore
Terrie Farley Moran
Liz Mugavero
Nadine Nettmann
Carlene O'Connor
Carlene O'Neil
Nancy Parra/Nancy Coco
S.C. Perkins
Rosie A. Point
Summer Prescott
Linda Reilly
Barbara Ross
Cindy Sample
Debra Sennefelder
Paige Shelton
Karen Rose Smith
Dorothy St. James
R.L. Syme
Morgan C. Talbot
Chelsea Thomas
Joyce Tremel
Diane Vallere
Kirsten Weiss
Linda Wiken
Kate Young
Neila Young

Blogs I love

Mystery Lovers' Kitchen
Mother of the Bride
Escape With Dollycas Into A Good Book
Lisa Ks Book Reviews
Kings River Life Magazine
KRL News & Reviews
Mystery Rat's Maze Podcast
A Cup of Tea and a Cozy Mystery
Lesa's Book Critiques
Dru's Book Musings
Chatting About Cozies
Shelley's Bookcase
Cozy Up With Kathy
mjbreviewers
Cake Wrecks

Archives